Friday, January 13, 2017

Naval War battle report 4: Denmark Strait

After far too long not playing, I finally managed to get in my first proper game of Naval War using the current version of the rules.
While most of my games so far have been cruiser battles in the Pacific, with an occasional carrier appearance, for this game we will be fighting a battle at the other end of the world.

We head over to the northern Atlantic ocean, where the German battleship Bismarck and heavy cruiser Prinz Eugen are trying to get clear of the Royal Navy so they can massively threaten Allied convoys between the USA and Britain.

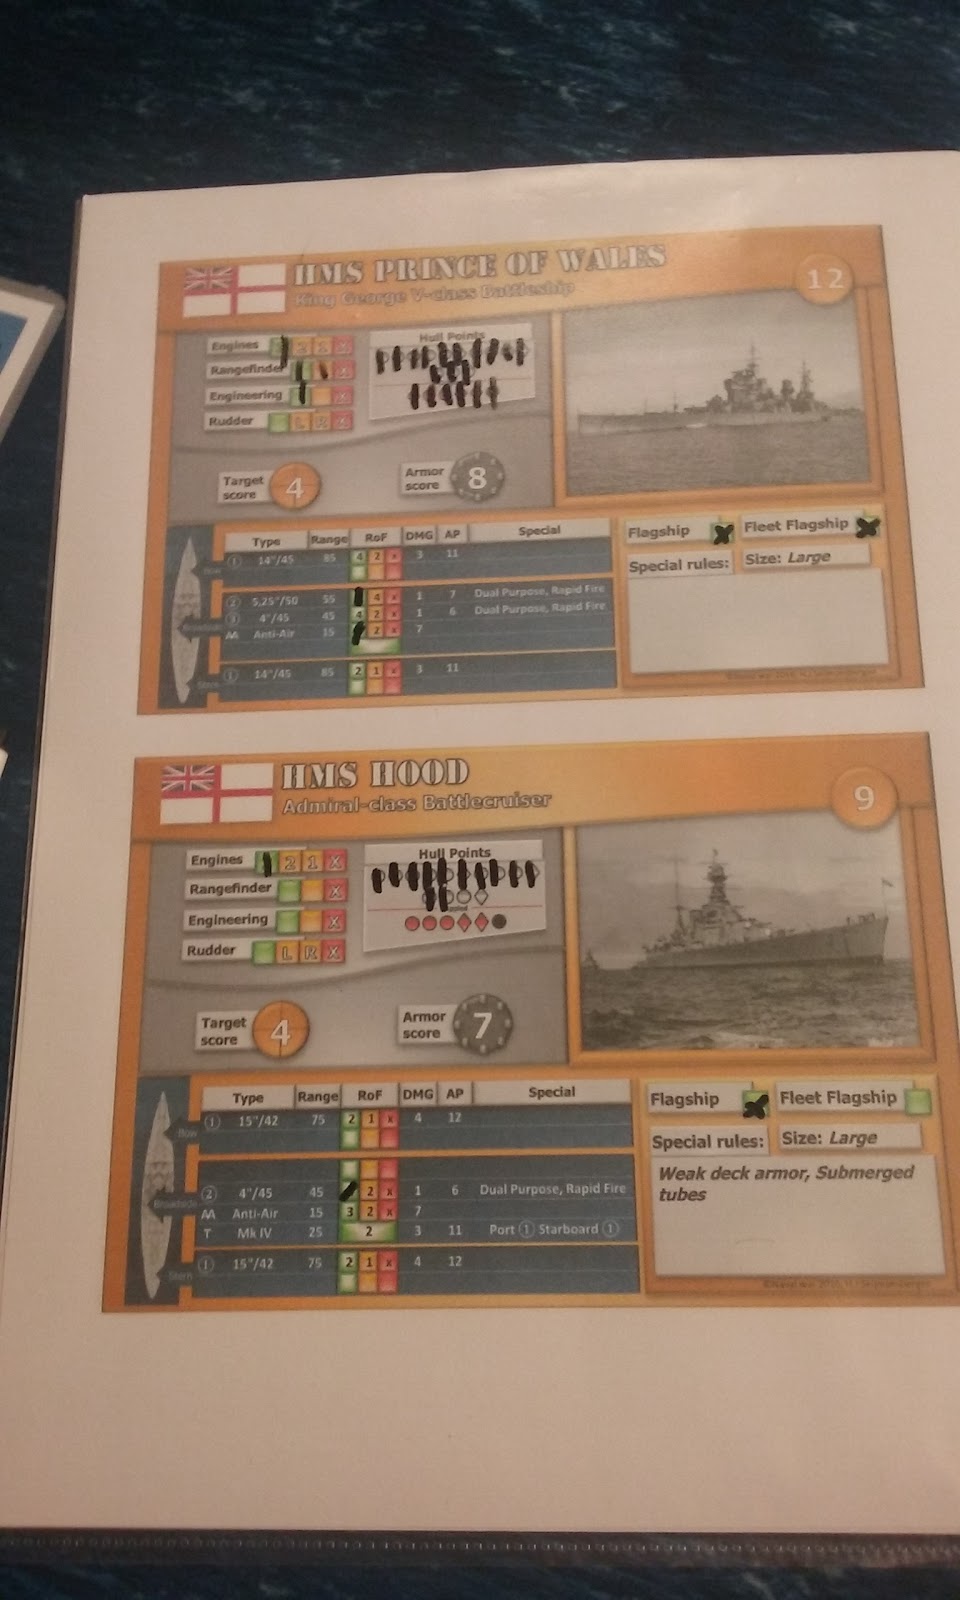
In their way are the British battleship HMS Prince of Wales and battlecruiser HMS Hood.
Although Bismarck herself is superior to either British ship, a battleship and battlecuiser together should be able to vanquish a battleship and heavy cruiser.


Here we have the situation early in the battle.
The British force played by myself is at the bottom of the image, with HMS Prince of Wales (which had not moved yet during this turn) to the right and HMS Hood to the left. I have both of them operating as single-ship squadrons, which provides me with a total of four orders per turn: one for my fleet flagship (HMS Prince of Wales), two for the two large ships and one for my fleet commander, a Rear Admiral. He also gives me an extra disruption token each turn, which means I will always have one more disruption token than the German opposition has orders.

At the far side of the table we have the German force played by the owner of the local gaming store, de Purperen Draak. Bismarck is the larger vessel to the left, with Prinz Eugen by its side.
The German vessels have been put into a single squadron, giving them four orders per turn as well: one for the fleet flagship (Bismarck, of course), one for the single large ship, one for a squadron of two or more ships led by a flagship and finally one provided by the German commander. Being together in a squadron also lets one activation order activate both vessels, but at the cost of needing to stay close together. The German commander also provides a disruption token, giving both of us four orders and five disruption as long as we don't take any losses.


Let's skip forward a few turns since we deployed a bit too far apart. Seeing some pretty straightforward movement does not generally provide great tension.

Here, we can see how things are turning out: I'm sort of splitting my forces, leading off with the much sturdier Prince of Wales while Hood, which has powerful (but slightly short-ranged by battleship standards) guns but weaker armour hangs back a bit. This is a gamble, since it might leave Hood out of the fight for 1 or 2 crucial turns getting into range.

However, the Germans outrange me and have decided to turn ahead of me, hoping to deliver broadside fire against my front arcs.


To make matters worse, HMS Hood is in fact already in range of the Bismarck, which scores a solid hit among her first ranging volley. Fighting at these ranges, Hood's lackluster deck armour is really proving to be an issue.


As the Brits maneuver in on the next turn, their ranging fire fails to find the Bismarck.
Prinz Eugen finds the range of HMS Hood as well, though, and with the plunging fire her eight-inch guns are actually a fair threat.
Of course, Bismarck herself also unleashes a devastating broadside:


Two turns of fire at extreme ranges, with part of that spent ranging in, have clearly shown how Hood's iconic weakness has been exploited by the Germans.

Considering how close she was to the edge of the battlefield, I decided to use my commander's once-per-game ability to automatically pass the command check caused by this damage. I can't have this battlecruiser just running off without dealing significant damage.

As for the British return fire, it has still failed to find its mark despite the considerable number of 14- and 15-inch shells being flung towards the German battleship.


Of course, the next German volley proves equally devastating  despite British attempts at evasive maneuvering and causes another command check.


I try to re-roll the failed check using the "England expects every man to do his duty" special order, but German disruption prevents it from taking effect.
Of course, this means that HMS Hood breaks off. Being so close to the edge of the battlefield, she has no chance to rally before leaving the fight.

In the meantime, Prince of Wales has finally found the range on the Bismarck and is trying to deliver as many 14-inch shells as she can, trying to utilise a sustained fire training order two turns in a row.
However, things keep going wrong (thanks to German disruption) and unfortunate accidents instead reduce the effectiveness of her rear primary gun turret and her secondary guns. The shots that do connect are not as effective as one might hope thanks to quality Krupp armour (a German special order allowing you to re-roll saves).
She does deal a little damage to Bismarck and causes some flooding, though.

And then Prinz Eugen manages to get a decent firing angle for her starboard torpedo tubes as the battle is starting to turn into more of a brawl, with three torpedo hits and some pretty nasty damage as a result:


The die to the right of Prince of Wales indicates the amount of flooding, which is pretty bad.
One good thing in this turn is that the German leadership did not have enough orders to have Bismarck fire at Prince of Wales after her evasive action.
One bad thing is that a full broadside hit of 14-inch shells gets mostly saved through solid rolling and proper application of the Krupp armour special order. Making the opponent roll eighteen saves feels quite good, though.
Still, a quality volley could still get rid of Bismarck in one turn.


...and then I try to repair the four points of flooding I have.
Yup, one fixed with that 4+, but each result of 1 adds another flooding effect instead.
All of this damage ends up crippling HMS Prince of Wales, but her crew stand firm and choose not to flee just yet.
Sadly, Bismarck also passes her command check, which makes a lot of sense considering the current state of the battle.


On the next turn, the British side gets to activate first, but all of the clore-range fire only slightly dents Bismarck while secondary shots mostly bounce off Prinz Eugen.

Then the Germans get to shoot.

Bismarck's point-blank range volley with all guns brings Prince of Wales to the brink of destruction and sets her afire in addition to the flooding, after which some lucky hits from Prinz Eugen manage to finish her off despite desperate evasive action.

In the end, we get something fairly similar to the historical outcome, but probably even a bit worse; a seriously battered Hood makes it back home, but a brand new King George V-class battleship has been lost.

The damage caused in return was also rather limited: Bismarck took some serious dents but is still fully operational in terms of mobility and weaponry.
Assuming her fuel stores have not been damaged (as happened historically) the German pair would be more than capable of hunting down convoys while avoiding British warships trying to hunt her down.

Overall, quite an interesting little battle, especially considering that we had only two ships per side.
Initially, I was afraid that the British side would outmatch the Germans a bit too strongly, but as it turns out the Germans had some advantages that proved more important than they seemed, like their superior range which allowed them to start shooting a turn before the British.

Dice rolls this game were pretty even; both sides had both good and bad rolling, with a few stand-out moments like that full broadside hit and that total cock-up at flooding prevention.

For my first game using battleships, I feel they add an interesting factor to the game and look forward to using them more, especially in combination with more ships of other types.

I do have HMS Repulse and IJN Nagato waiting in the wings, with IJN Mutsu, Hiei and Kirishima still on the painting table as well, so that should provide some interesting options for the future.

About Naval War:

Naval War is a free living ruleset (which means it gets regularly updated to correct errors and clarify issues) that can be found at https://www.naval-war.com/.

If this seems interesting, do head over there, grab the rules and get some ships (or even just printed tokens to represent them) and head into the fight.
We in the community also really enjoy reading about your experiences with the game, no matter how glorious or horrendous they may be.

Wednesday, October 5, 2016

Naval War Battle Report 3: Java Sea Clash

I'm finally back after rather a long hiatus due to various circumstances. Posting rate will probably remain a bit erratic since I'm rather busy with various things, including looking for a job.

A few weeks back, I had the opportunity to play a game of Naval War against the developer, Hendrik Jan Seijmonsbergen at a Ducosim convention.
We would also be using the most recent test version of the rules, a draft of version 1.3.

After going a bit back and forth about points values, we ended up going for 200 points per side with a Java Sea theme.
This meant I would be be commanding a multinational mix of mediocre to bad ships vs a proper IJN cruiser-led force. A pretty interesting contrast of force buildups.

When we got started, I promptly messed up and accidentally put down the 250-point list I'd been considering earlier when we were still talking about that points value. That got rectified a bit onto the game, resulting in me removing three US and one British destroyer to even things up.

The proper army lists:

ABDA Cruiser Squadron:

Officer: Karel Doorman (most expensive and elite option, gives his flag squadron a free pregame move)

HNLMS De Ruyter light cruiser
HNLMS Java light cruiser

USS Houston heavy cruiser
HMAS Perth light cruiser

N-class destroyer
E-class destroyer
2 Admiralen-class destroyers

Eastern/Center Invasion Force (Imperial Japanese Navy):

Officer: Chu-sa (default choice, cheapest)

2 Myoko-class heavy cruisers
1 Shiratsuyu-class destroyer

3 Mutsuki-class destroyers (in distant cover)

We went for a simple encounter battle with a few islands on one end of the board and a pair of squalls on the other side that would slowly drift towards the far corner of the table.

Both of us ended up taking pictures whenever we could remember to do so. The brighter, higher-quality images are from Hendrik-Jan, the others from me.
Because we got distracted a few times, there are some moments that lack a few pictures.

Deployment looked like this:


Note the small size of the IJN force; this was kind of disheartening for my opponent to look at.


To be fair, this force here still contained one E-class destroyer too many and the Clemson-class destroyers still off-table would be retconned away as well.
We have Houston and Perth on the left, ready to either travel around the squalls or cut in to engage the IJN heavies. De Ruyter and Java are in the middle, ready to move up aggressively. The destroyer squadron would flank aggressively around the island.


On the other end, the outnumbered but technically superior IJN force would just steam steadily towards the ABDA force, where they could hopefully exploit their superior gunnery before letting loose some long lances.

Turn 1


All forces advance, the Dutch light cruisers in the center a bit further than the others because of their pre-game movement granted by Doorman.


Things are quiet for now. My opponent is kinda dismayed by how many order tokens I'm getting per turn compared to him, because of how cheap my ships are.

Of course, the low points values of some of these ships, especially the Dutch cruisers (which are cheaper than a decent destroyer) have a very good reason; they're rather unimpressive.

Turn 2

Turn 2 is where the proper firefight starts. The lead IJN cruiser opens up on HNLMS Java, dealing limited damage. Java's guns cannot reach her assailant, so she tries putting some potshots into that Japanese destroyer instead, ranging in effectively.

The rest of the turn is mostly uneventful maneuvering.

Turn 3


Turn three starts off with the IJN destroyer squadron arriving as support.
The ABDA destroyers also sped along the IJN side of the table, threatening a potentially devastating torpedo assault against the Japanese cruisers in the future.


A view of this situation from the Japanese side.
That's a lot of targets. But some of them, in particular USS Houston, have started to return fire. No heavy damage will be dealt this turn, though.


A bit more of an overview. At this point the Dutch cruisers have decided this is not the place they want to be, trading fire with proper heavy cruisers.
After all, one of them was designed prior to WW1 and built during that conflict, while the other is even less capable in a fight because of budget cuts during construction.

On the far right, we can also see the trio of Clemson-class destroyers that was not supposed to be there. They will be disappearing shortly.


This trio of IJN destroyers are the threat of the hour, though. They'll be in a excellent position to threaten the fleeing Dutch cruisers with only the ABDA destroyers to sort-of stop them.

Turn 4

This turn was a big one, which is why we forgot to take many pictures.
To start things off, the IJN destroyers charge forward and basically empty their torpedo launchers at the ABDA forces in range. The Dutch cruisers are threatened by them in particular, but the Japanese hope to also catch some destroyers in there.


In response, the ABDA destroyers decide to leave more than half of their torpedo armament as a goodbye present (pictured) before advancing barely out of the danger zone at flank speed.
The cruisers also try to get away, but still end up in the path of a pair of spreads.
But these shots will only be resolved at the end of the turn.

Seeing his chance, the Shiratsuyu-class destroyer accompanying the IJN cruisers leaves that squadron to turn towards the ABDA force, hoping to set up a torpedo run next turn.
Meanwhile, the cruisers start ranging in on Houston, hoping to take the biggest threat to them out of the equation.

In the meantime, USS Houston, now ranged in on the lead IJN cruiser, lets loose a full broadside that proves brutally effective, dealing significant damage and also unnerving the Japanese captain, causing him to have his ship break off and flee from the battlefield. A shameful display.

Turn 5


By the start of turn 5, things had changed a fair bit on the battlefield. As one can see, both of the Dutch cruisers took torpedo hits and had some flooding issues and Java, previously damaged by Japanese cruiser fire, has ended up breaking off.
In fact, HMAS Perth in the other ABDA cruiser squadron has also suffered a long lance hit that caused some flooding; she underestimated the effective range of the IJN torpedoes and sailed right into the danger zone last turn.
In return, the IJN lost the flagship of their destroyer squadron and took some damage on the other destroyers as well.


Now, the ABDA destroyers open up against the enemy destroyer trying to pass them by, dealing some damage but failing to take her out of action.


The situation on the other part of the board: two torpedoless destroyers versus two old and battered light cruisers. Nothing really ends up happening here.


In fact, Java will fail to rally and sail off the battlefield, still a serious loss for the ABDA fighting power.


The remaining IJN cruiser continues her fire against Houston to decent effect.
After this, she will turn towards her and hide in the nearby squall.


Here, Houston is still here, ready to fight off the opposition.
Just afterwards, the IJN destroyer will swoop in and launch her torpedoes before frenzied Allied fire can take her out; Houston will go down from the hits while Perth also take some more damage, effectively deciding the game in favour of the IJN side. It does finally result in the destroyer sinking from a torpedo from the ABDA destroyers, but that would generally be considered a valid trade for a Northampton-class heavy cruiser.

Turn 6 (end of game)


This is how things stand in the end. the IJN heavy cruiser Nachi is still going strong and even has a full torpedo load remaining just in case. The force would flee if they took any more losses, but the enemy broke just a little bit earlier.


ABDA still had twice as many ships remaining as the IJN, but theirs were quite a bit more damaged and the cruisers were inferior to start with.


The ABDA destroyer squadron did make it through mostly intact, though with all their torpedoes spent. While it would be unclear if HMAS Perth could escape this situation, they almost certainly could, probably along with HNLMS De Ruyter, making this at least not a total loss for the Allies.
After all they did sink several modern destroyers and an excellent Myoko-class heavy cruiser, which most would consider a serious blow to the IJN.

Final thoughts

Well, this was a pretty interesting battle, even with the army list mishap and us getting distracted regularly be con visitors asking questions and talking to us about the game and naval warfare in general.
I could have fought it quite a bit more effectively, though, especially since I didn't really grasp how to employ them properly. The best option would likely be to cautiously use them as destroyer hunters.

I did quite like the changes made to the rules for the 1.3 version, which will hopefully be released in the near future with some more tweaks based on things that happened in this battle, like some less-ambiguous wordings in a few places.

About Naval War

Naval War is a WW2 naval wargame developed by Hendrik Jan Seijmonsbergen. It is available as a download for free if you register at the official forums: http://navalwar.boards.net/ and will continue to be updated as a living ruleset.
I recommend you give it a try, even if it's just using some printed top views of warships instead of models. If one of us players lives near you, we might also be able to give a demo game.

If you end up playing the game, we would appreciate it if you post battle reports and/or general feedback about it over there, so we can use the information to make the game even better.

Monday, February 15, 2016

Naval War playtest Battle Report 2: Carrier Clash

Time for another test game of Naval War.

Since my first game, I've played a couple of additional games using the same forces, including against one of my local players.
With a couple of cruiser battles under my belt and a shiny new Shoukaku miniature painted, I felt it was time to try some air operations.

The rules for aircraft are still in a somewhat rougher state at the moment, but after some quick clarifications by the designer I knew enough to get started.
I went with another solo game for this.

The scenario is pretty simple: two carriers (each with a small destroyer escort) have become aware of each other's presence. Aircraft are scrambled and battle is joined!
Both sides are using forces from the Coral Sea Order of Battle.

I would start using just air attacks, maybe trying for a surface engagement if I felt one side or the other had good odds there.

US force: 
USS Yorktown, carrying:
-Air group: 3 F4F Wildcat fighter flights, 6 SBD Dauntless dive-bomber flights, 3 TBD Devastator torpedo bomber flights
3 Sims-class destroyers (1 squadron containing USS Morris, USS Hammann, USS Anderson)

IJN force:
Shoukaku, carrying:
-Air group: 3 A6M2 Zero fighter flights, 4 D3A Val dive-bomber flights, 5 B5N2 Kate torpedo bomber flights
3 Fubuki-class destroyers (1 squadron containing Akebono, Sazanami, Ushio)


Deployment:

Both sides in the corners, ready to just move in parallel with the board edges.

DD Squadrons in front of the carriers, within AA range.


The US force.


The IJN force.

Tuesday, January 12, 2016

Naval War playtest Battle Report 1: US Navy vs Imperial Japanese Navy

First off, my apologies for the lack of content recently. I´ve been pretty busy over the holidays and haven´t managed to play much. I did play a ton of Team yankee games just prior to the holidays, but I didn´t take any pictures then.

Today, I decided to do somethign different and play a solo game to playtest Naval War, a new WW2 ruleset currently in development by Hendrik Jan Seijmonsbergen.
Visit http://navalwar.boards.net/ to learn more about the game and become a playtester.

Since this would be my first game with the system, I decided on a pretty simple scenario: an encounter battle during daytime, on open seas without any terrain or weather.


My collection of ships is a bit eclectic, since I got started with a bunch of random Axis and Allies Naval boosters, but mostly focuses on the Battle of the Java Sea. Since there isn't an order of battle for that yet in the playtest, I'll be using the Coral Sea forces (which have a lot of the same ships, especially on the IJN side) with a bunch of proxies.

Wednesday, November 25, 2015

Team Yankee Battle Report 1; Proxy War

With the rules for Battlefront's new Team Yankee Cold War now fully available if you know where to look (hint: it involves friendly local gaming stores) I decided to try a relatively simple test game to see how things work.

There were a few problems with this, though:

  1. I didn't have the proper minis for any of the vehicles I'd want to use. So, time for proxies.
  2. I don't have any proper wargaming terrain at home; that's all at the FLGS. Fortunately, I had some stuff to improvise with.
  3. I didn't have an opponent. Easily solved by playing both sides, with some helpful tactical input from a few anonymous posters on a certain imageboard.
The forces used would be like this:


Red Banner Tank Division
BMP Motor Rifle Battalion
HQ AK-74 and BMP-2 - 2 points - proxied with WW2 Soviet infantry and a reversed T-34/76
BMP-2 Motor Rifle Company: 4 AK-74, 3 RPG-7, 4 BMP-2 - 8 points - proxied with WW2 Soviet infantry and reversed T-34/76s
BMP-2 Motor Rifle Company: 4 AK-74, 3 RPG-7, 4 BMP-2 - 8 points - proxied with WW2 Soviet infantry and reversed T-34/76s
2S1 SP Howitzer Battery: 3 2S1 - 5 points - proxied with reversed T-34/85s
T-72 Company: 6 T-72 - 27 points - proxied with T-55s

25th Armoured Division
M1 Abrams Armoured Combat Team
HQ: 1 M1 Abrams - 8 points - proxied with a M48 Patton
M1 Abrams Platoon: 2 Abrams - 16 points - proxied with M48 Pattons
M113 Mech Platoon: 4 SAW, 4 Dragon, 4 M113 - 7 points - proxied with Canadian infantry and turretless welded-hull Shermans
M106 Heavy Mortar Platoon: 3 M106 - 3 points - proxied with turretless cast-hull Shermans


Both sides have 50 points of units. All are part of their formations, with no support units from the larger organisation.

So, what would the battlefield look like?
Like this:


Saturday, October 24, 2015

Flames of War Battle Report 8; Heer Grenadiers vs Desert Rats Lorried Rifles

Our local Infantry/Mech is still going strong and I was able to take some pictures of my most recent game in it.

This time, I would be playing Germans against the slowly-growing British force of one of our local players.
We're in the second round of our league, which means 700-point games where Support Platoons are allowed but can't capture or contest objectives.
Keep that bit in mind; it'll be relevant.


This is the battlefield we'd be fighting over.
The mission would be No Retreat.


Saturday, October 17, 2015

FoW Team Yankee pics from Spiel Essen

Last weekend, I went to Spiel Essen, one of the premier board games conventions in the world.
Aside from board games, there's also a wargaming presence. One of the companies that tranditionally has a stand there is Battlefront, the makers of Flames of War.

This year, they had a whole bunch of previews for one of their upcoming releases, Team Yankee.
This ruleset is a streamlined version of the Flames of War rules that focuses on a hypothetical scenario: what if the cold war "went hot" in the mid-1980s.
The forces in the initial release will be based on those from the novel "Team Yankee" by Harold Coyle. This means US versus Soviets in southern Germany. 

One of the ways things have changed is that units will now have reference cards which contain their stats, points values and special rules so they're easy to check.
They had a whole bunch of these at Spiel and I managed to take decent pictures of most of them. I also got to read part of the rulebook.

A few of these have been spoiled on Breakthrough Assault since I took these pictures, but I left them in anyway.

However, we start off with a card that doesn't contain unit stats:


Instead, we get a couple of special movement options units will apparently have in this ruleset.
They offer improved mobility options, but only if you pass a skill check. Which means that more skilled troops are better at using these advanced tactics as well, which makes sense. I do think the restriction of being close to the command team is going to be tricky.

The Blitz move could be really devastating if used well, for example to have a unit with anti-tank guided missiles (ATGMs) which can only fire from the halt pop up and shoot anyway. Of course, the penalty for failing this check is pretty harsh as well.
Follow Me! reminds me strongly of Avanti! and similar special rules used by a few countries in FoW. A simple option if you want some extra movement and weren't planning to shoot anyway. This one would be especially useful if it can be used after a Dash movement.
Shoot and Scoot is basically a Stormtrooper move. Who doesn't wish their non-German troops could make those? Well, in the 1980s, they can.
Cross Here allows extra mobility across difficult terrain, always useful to have.
Dig In is as might be expected, although the distance restriction could be tricky here as well. I'll have to see how this works out when we've got the full rulebook to look at.